Wednesday, May 22, 2013

Baptism Frames

At the church we are attending we hand out something to commemorate baptism.  This Sunday there are two baptisms and I was asked to make something for each child and their family.  My mother-in-law described an idea she saw, and since I am terrible at coming up with my own ideas for stuff like this I used her description!  I never saw the original that she was describing, so I like to think this is my own creation :)

Materials used:
  • Inexpensive 4x6 frame
  • Solid colored scrapbooking paper (I always use textured)
  • Patterned scrapbooking paper (again, quality counts....cheap paper looks like cheap paper)
  • Velum paper (printed on with just a standard ink jet printer)
  • Brads (to neatly attach the brads without wrinkling the paper punch a whole with an exacto-knife)
  • Ribbon
  • Adhesive (I use the sticky on both sides scrapbooking squares)
I left the glass of the frames out, I think the textured look is really fun looking.  What I did though is put the glass behind the paper to make the back fit well, that way if the recipient decides they want it they can always use it!


Monday, April 30, 2012

Baby Girl Clothing Dividers

I found this idea on Pinterest (so no, I did not come up with it) but it looked so easy and such a great idea!  We just found out we are having a baby girl, and so my brain has begun the process of thinking about what we need to start doing to prepare!  These closet dividers are the perfect way to organize baby clothes.  

Supplies needed:
  • Acrylic paint
  • Glue
  • Mod Podge
  • Paintbrush
  • Wooden O's (I bought 6, but only used 5)
  • Scrapbook paper
  • Sticker letters
  • X-acto knife


Paint the outside, inside, and one side of the wooden O's.  (*Hint: paint the outside first, then inside by holding it, then lie flat and paint one side.)

Let them dry (doesn't take very long).  Then lay out on the scrapbook paper, instead of tracing them and then cutting them out I just ran the x-acto knife along side the O.  Worked really well!

Glue on the scrapbooking paper (keep the glue REALLY thin, I made the mistake of making a couple too gloppy and it made the paper wrinkle a little).  Stick on the letters/numbers. Next, mod-podge using a paintbrush.  I've never used this stuff before so I was just guessing how much to put on, I used a moderate amount......

Let dry, then commence organization!  I own zero baby clothes.....but when I do I will be ready for them!


Monday, April 16, 2012

Framed Fabric

I am so not someone that is good with art work....I don't want to pay for it and I don't ever know how to use it! So I found some cute fabric and bought a 3-5x7 picture frame. Wha-la, art work for the wall!


All you need is fabric, frame, and scissors. (I thought maybe I might need some tape to hold it in place, but it was fine without).


This 'art work' was for my laundry room, we recently repainted in there and I needed a little something on the wall. Perfect!


Monday, January 23, 2012

Cute as a Button baby shower

I threw a baby shower for my sister-in-law. She is expecting a baby girl April 1, and we are all so excited for her arrival! I wanted to make the shower full of pink and 'girly' things since I just know baby Evelyn is going to be a girly girl :).

The theme of the shower was 'Cute as a Button' and the colors I choose were pinks and brown.


Invitations:


White chocolate (dyed pink) covered pretzels as favors for each of the guests:


Prizes for the games, purchased at Target dollar spot.

White cupcakes with alternating pink frosting and chocolate.

Custom water bottles! So cute and so simple. I bought normal water bottles, pealed off the labels, then designed the labels in Microsoft word and had them printed at Kinkos on card stock paper, then hot glued them to the water bottles.


** Thank you so much to my mother-in-law, Elaine, for the amazing pictures she took during the shower! ***

Wednesday, January 4, 2012

Spice up a zip-lock bag!

Many people give treats to friends over the holidays. I often make puppy-chow (my ultimate favorite!) and give that away. In the past I have purchased cute tins to give it away in, but this year I just put it in zip-lock bags, added Christmas scrapbook paper, a cute sticker or ribbon, and wa-la.....an adorable bag!

Here is the recipe, it can also be found on the back of Rice Chex boxes:


http://allrecipes.com/recipe/puppy-chow/


And for those of you with doggie friends, I also made homemade peanut butter dog treats and put those in the zip-lock snack size bags. I found cute dog-treat stickers at the craft store to add as well.

Thursday, October 6, 2011

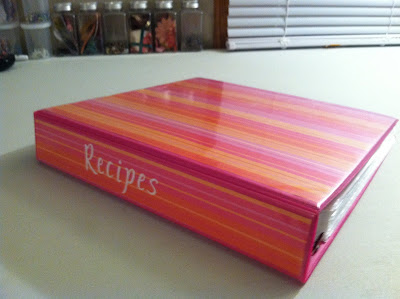
Recipe Binder

Need a good way to keep track of all those recipes you ripe out of magazines and the ones you print out online?

I use a 2-inch binder and use binder dividers to organize into appetizers, salads, meals, etc. I also put them in plastic page protectors, which keeps them intact and an added bonus if you spill on it while cooking/baking, just wipe the pages clean!